Cardinity is now part of

Shopify is one of the easiest e-commerce platforms to set up for your business; you don’t need to have any programming or design skills. It also has a variety of themes and apps for customisation and management.
Looking to set up an e-commerce store? Open your e-store on Shopify with these simple steps:
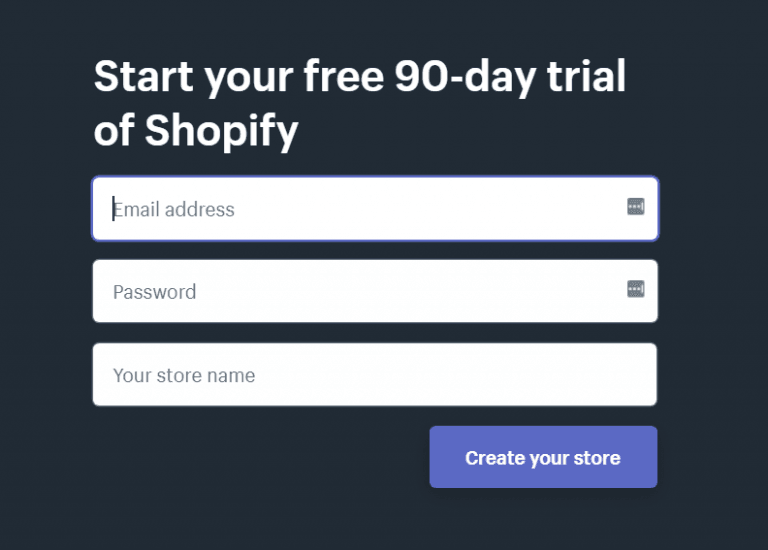
With Shopify, it's easy to create a simple online store as you don’t need to get a server and a developer to customise and maintain it. So, the first step is to go to shopify.com and click Start your free trial. You will only need to enter some basic details about your store and yourself, and your account will be ready in no time.
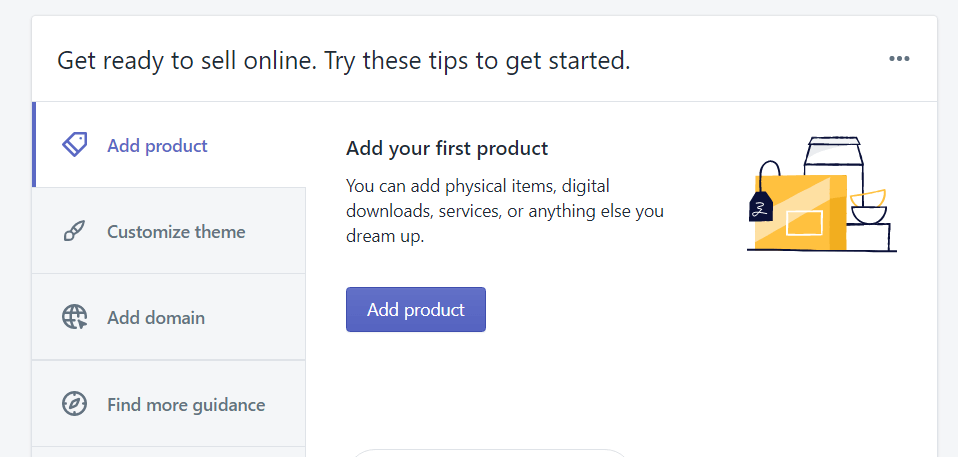
If you're not ready to choose a theme for your website and come up with a domain name yet, start by adding products you're going to sell. Just click the button Add product and fill in all the necessary fields. Alternatively, you can import products from a CSV file. There are some product details which you should never forget to add, such as good-quality product images and detailed product descriptions including colours, sizes, materials and other essential characteristics.
Now it’s time to select your domain name. Bear in mind that your domain name should be easily recognisable by your customers. To purchase a domain through Shopify, click Add domain and then Buy new domain. It can be renewed every year.
If you have already purchased a domain from another provider, don’t worry, as you can easily connect it to your Shopify store. After clicking Add domain, you will also see buttons Connect existing domain and Transfer domain. The latter means that you can transfer your existing domain to Shopify. For more information, check this Shopify guide.
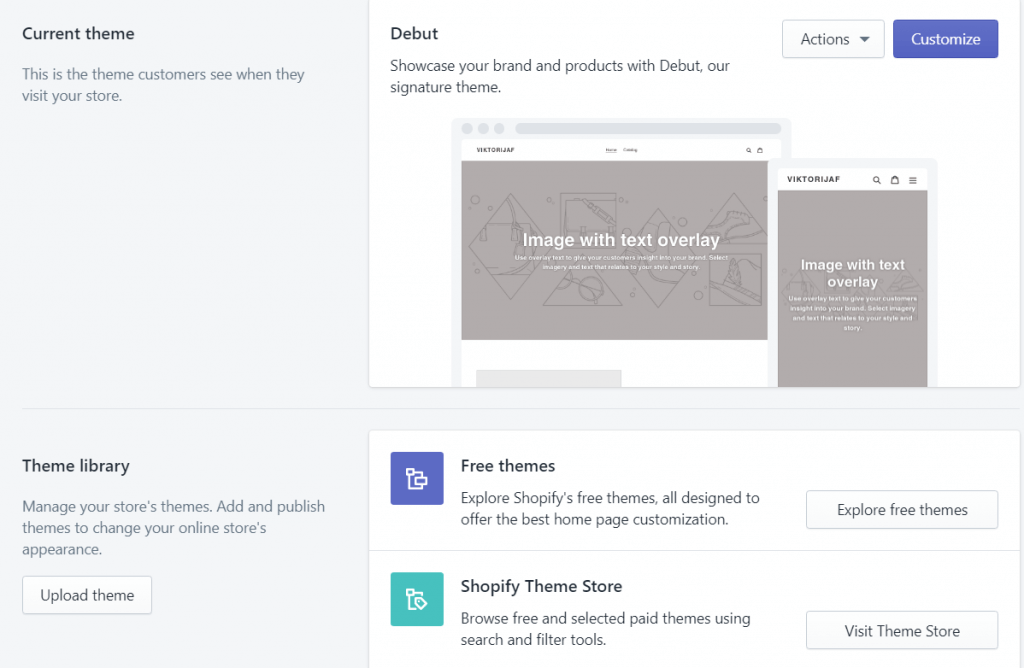
After adding the products and choosing a domain name, you can customise your e-shop and its design accordingly. On the main admin page of your Shopify account, find and click on Customize theme. There you will be able to select a free or paid theme for your online shop, choose colours, insert your logo, change the header, footer and more. Moreover, you will be able to preview how your website looks on both desktop and mobile.
What is left to add to your website now? Policies. You should not forget to add all the essential pages:
To perform better in search engine results, your Shopify store needs, not only detailed product descriptions, but also well-optimised content pages. They will make your website more discoverable. To create a page, go to your Shopify admin panel, choose Online store -> Pages and click on Add page.
Nomupay offers a payment gateway which can be easily integrated with your Shopify store setup so that you can seamlessly accept payments online.
You can find a complete guide on how to integrate Nomupay as your payment provider with Shopify here.
If you have followed all the steps in this guide, you are all set up and ready to accept payments on your website.
To get more information and help with your Shopify online store, go to the Shopify manual.